Automatic table placement
Newly opened supported poker tables move into the first available section in your chosen priority order.
 POKER TILINGMANAGER


Poker Tiling Manager automatically places supported poker tables across your own priority-based multi-monitor layout; so your focus stays on the action.
Set table destinations once, roll a secure 1–100 number whenever you need one, and keep an eye on your total session time.
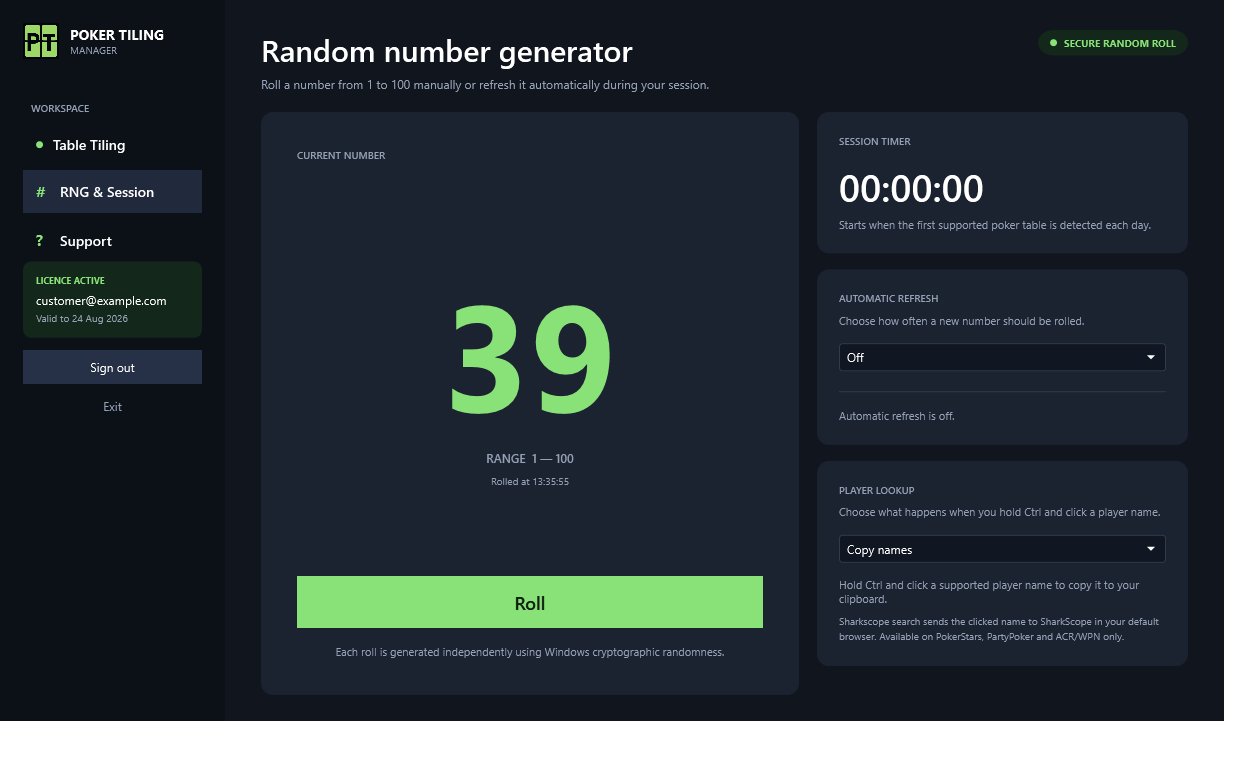
Roll manually or every 1, 2 or 5 seconds, track the session time, and choose whether Ctrl+click is disabled, copies names, or opens a SharkScope search.
Sign in with the account linked to your licence.
EMAIL ADDRESScustomer@example.comPASSWORD••••••••••••Customers activate after completing trial checkout, create a password, and sign in on one authorised Windows device. Sessions are revalidated while the app is running.
The app combines precise table placement with a focused RNG and timer page, without adding gameplay automation.
Newly opened supported poker tables move into the first available section in your chosen priority order.
Edit the complete Windows monitor arrangement on one canvas, or focus the pixel editor on a single connected screen whenever you need more detail.
Move and resize destinations with your mouse, or enter exact width and height values independently for every table section.
Move sections up or down to control which position receives the next detected table. Your configuration saves automatically.
Mix destinations across several screens in one priority order, including negative-coordinate and differently sized Windows displays.
Built for PokerStars, GGPoker, CoinPoker, PartyPoker, ACR / WPN, 888poker and our newest addition, iPoker (including Grosvenor), on Windows 10 and Windows 11.
Set Ctrl+click to Disabled, Copy names, or Sharkscope search. On PokerStars, PartyPoker, ACR / WPN, 888poker and iPoker, search mode copies the name and opens the matching SharkScope page in your default browser. iPoker lookup requires compatible local tournament history. Name lookup is not enabled for GGPoker or CoinPoker.
Roll a fresh number from 1 to 100 with one click, generated independently using Windows cryptographic randomness.
Refresh the RNG every 1, 2 or 5 seconds. The timer waits for the first supported table after launch and resets whenever the app closes.
Save several table arrangements by name, switch between them from the editor, update each independently, and delete profiles you no longer need.
Duplicate layouts or sections, undo and redo edits during your session, and restore automatic local layout backups. Moving a section to another physical monitor asks for confirmation.
Optionally snap mouse edits to a 10, 20 or 50 pixel grid. Select sections on one screen to align edges or centres and distribute gaps evenly. Typed pixel values stay exact.
Sign up through Stripe with your email and payment details. Your first 3 days are free, then monthly billing begins.
Create your password on the secure confirmation page after checkout. You can use the app during your trial.
Open the Windows app and follow the skippable tutorial to create your first layout. Replay it from Support anytime.
Try all features free for 3 days when starting a subscription. Payment details are required. After your trial, monthly billing starts automatically at £3.99 GBP in the UK or $4.99 USD elsewhere. Cancel in the customer portal before the trial ends to avoid being charged.
Payment details required. Nothing is charged for the first 3 days. Then the monthly price above applies automatically unless you cancel. Manage or cancel through the customer portal. Cancel anytime.
Download the latest Windows build, then sign in using the email and password you created after checkout.
Sign in safely without changing the Windows device attached to your licence. Your password is sent only to the secure licensing service.
POKER TILINGMANAGER